Dell XPS M1730 Disassembly Guide(Use at your own risk, I'm not responsible for any damage to your computer or parts.)
Time required: 1 hour +
Items required: Small screwdriver set, torx T9 (Only needed for GPU).
Ok, lets get started. This doesn't require a lot of skill, but patience is a must, so take your time going through all the steps. I recommend using separate ziplock bags to sort your screws from each step so you don't mix them up, and mark the bag for each step. If you are applying thermal paste, I recommend using lint free cloth or coffee filters and 91%+ isopropyl alcohol to clean the components. Use gloves to keep oil from your fingers off the components, also watch out for static (if you don't trust yourself, invest in an anti static band.).
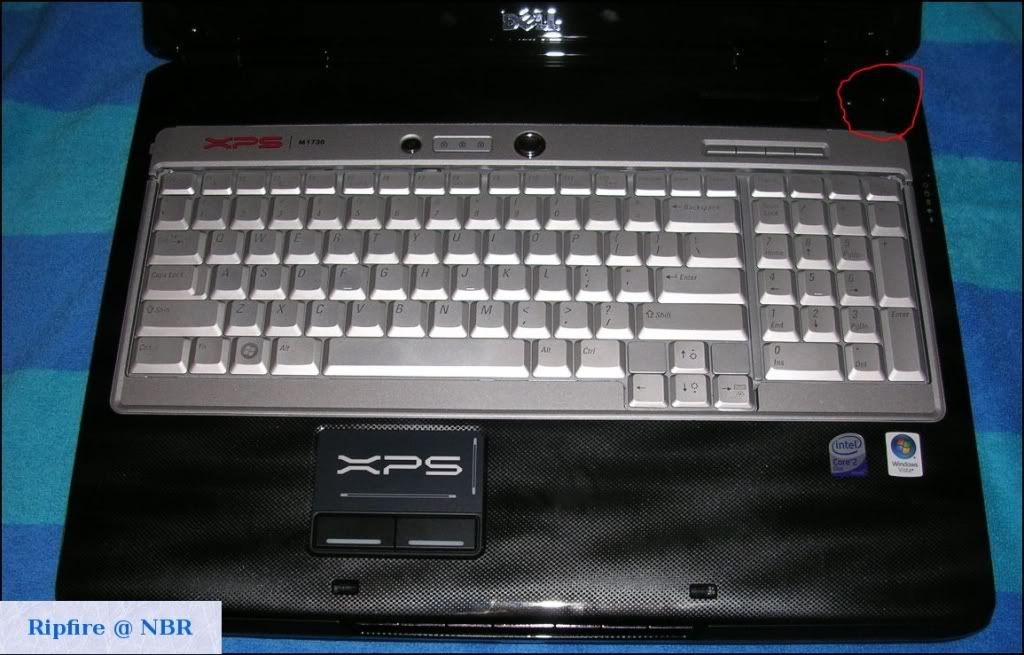
Step 1:
Start by removing the panel above your keyboard, there is a notch in the right side. Once you get it started gently pop the tabs up down the length of the panel, don't break them.
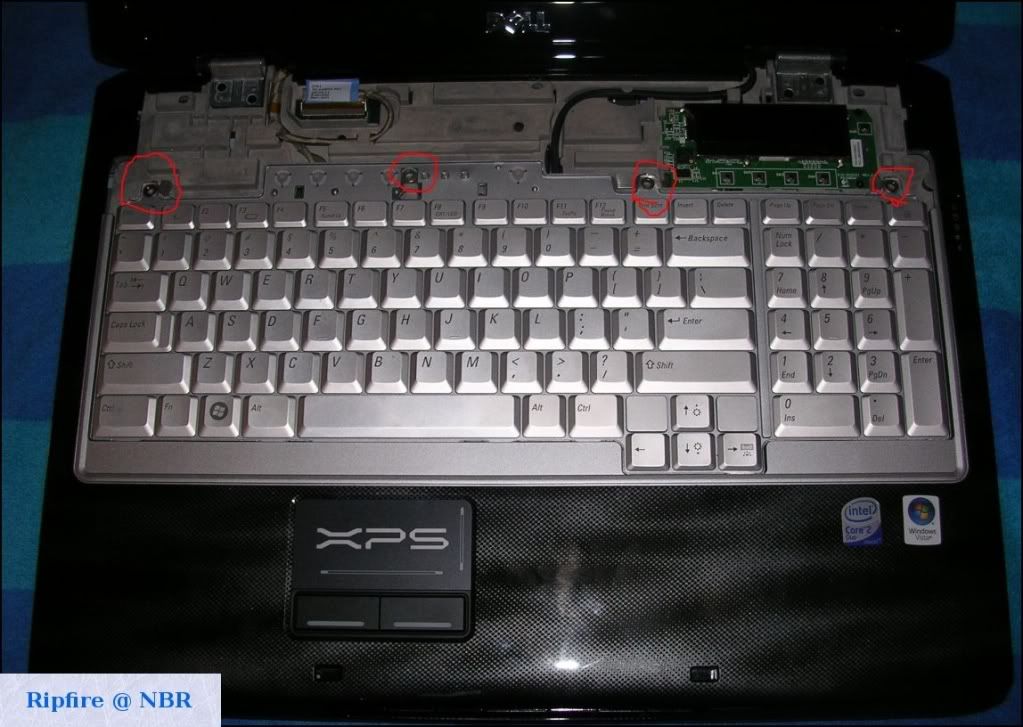
Step 2:
Remove the four screws that hold the keyboard in place.
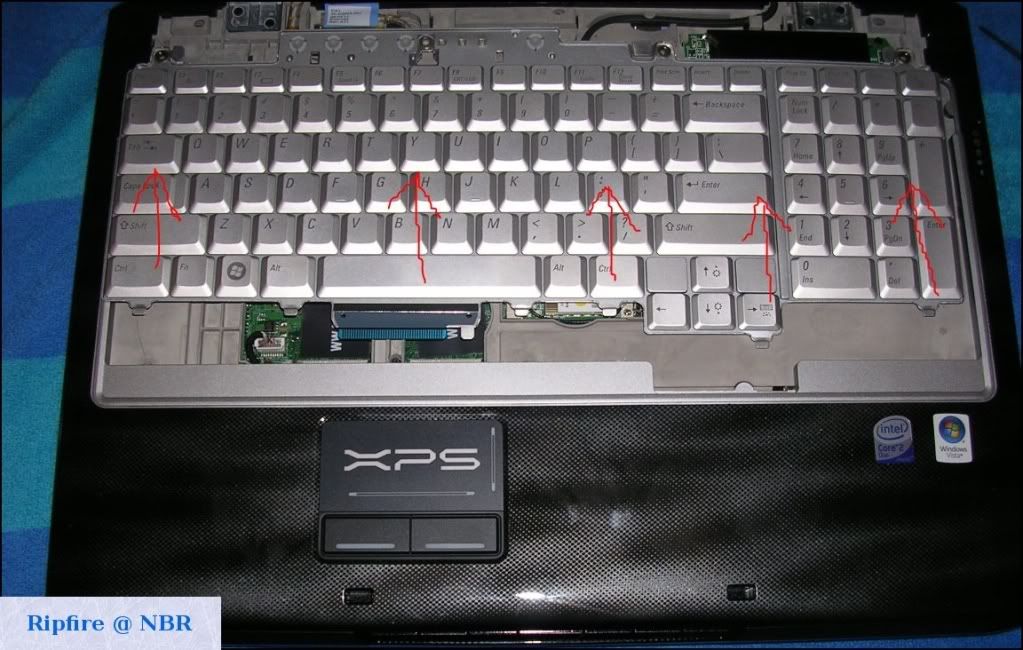
Step 3:
Gently slide the keyboard towards the LCD, after its free, remove the ribbon cable underneath.
Step 4:
Disconnect the LCD ribbon/cables and the wireless card cables.

Step 5:
Unscrew the LCD hinges and remove the LCD lid. Place it somewhere out of the way for now.
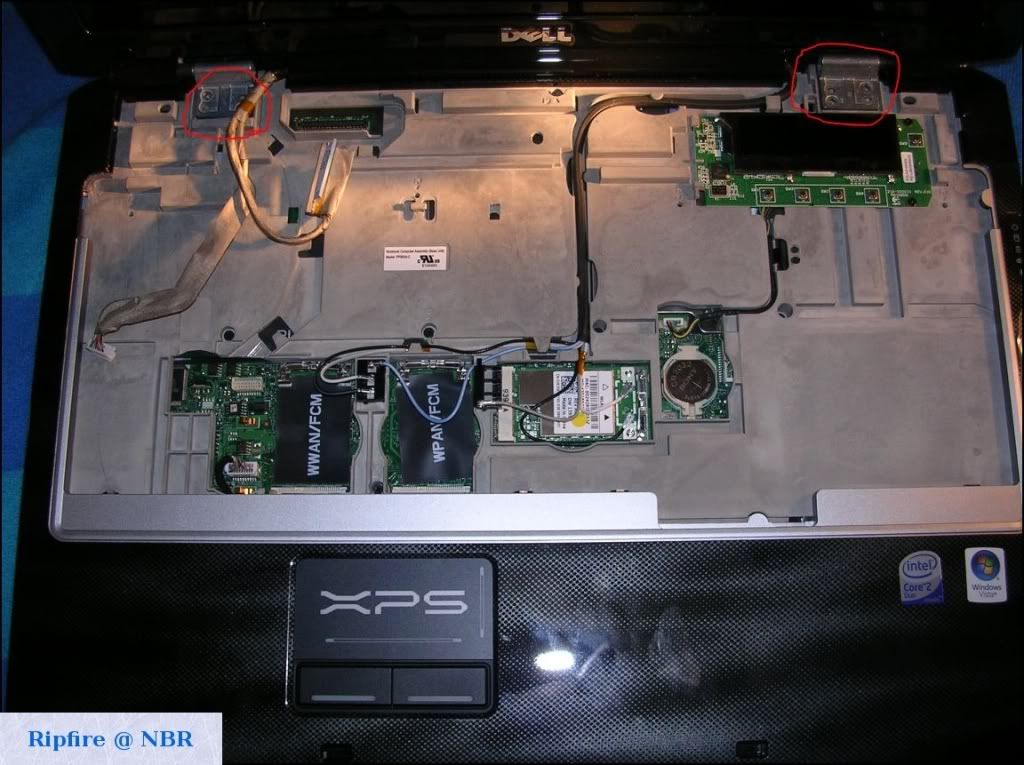
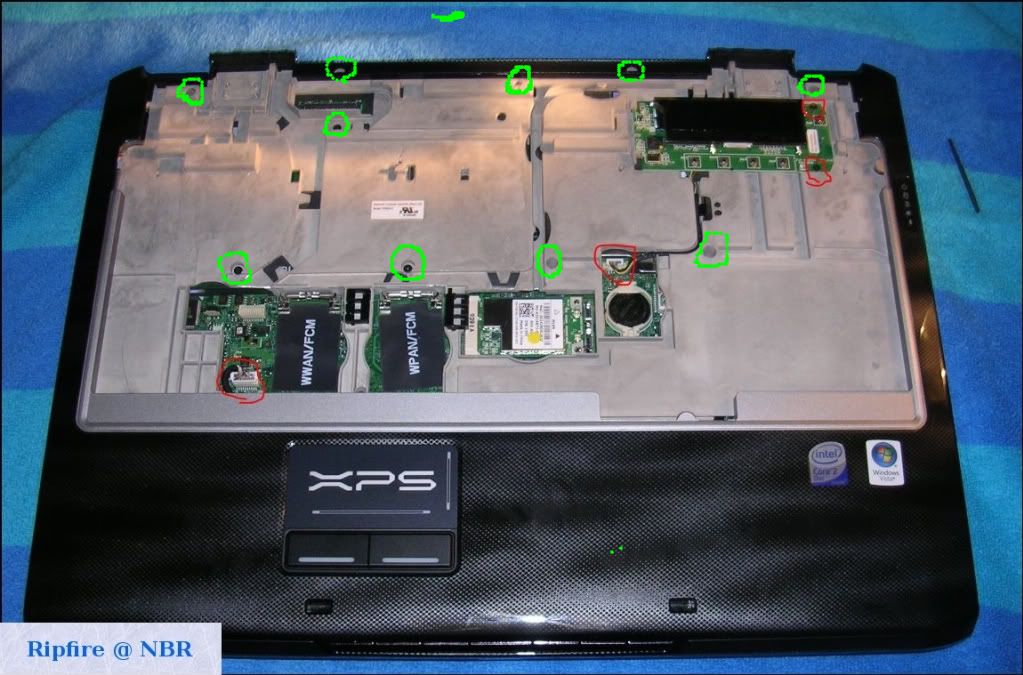
Step 6:
Remove the 2 screws holding the Logitech LCD in place, disconnect the cable and remove it, also disconnect the other marked connections. Then remove the screws marked in green, I left this out in the original post by mistake, so marked these by looking back at my pictures, so I may have missed one or marked a hole that is not screw.
Step 7:
Flip the notebook over, open your HDD bay and remove the drives (one screw is hidden in here), then remove the 15 screws marked, this includes the one with the lock symbol, this frees your dvd drive, go ahead and pull that out after the screws are removed.

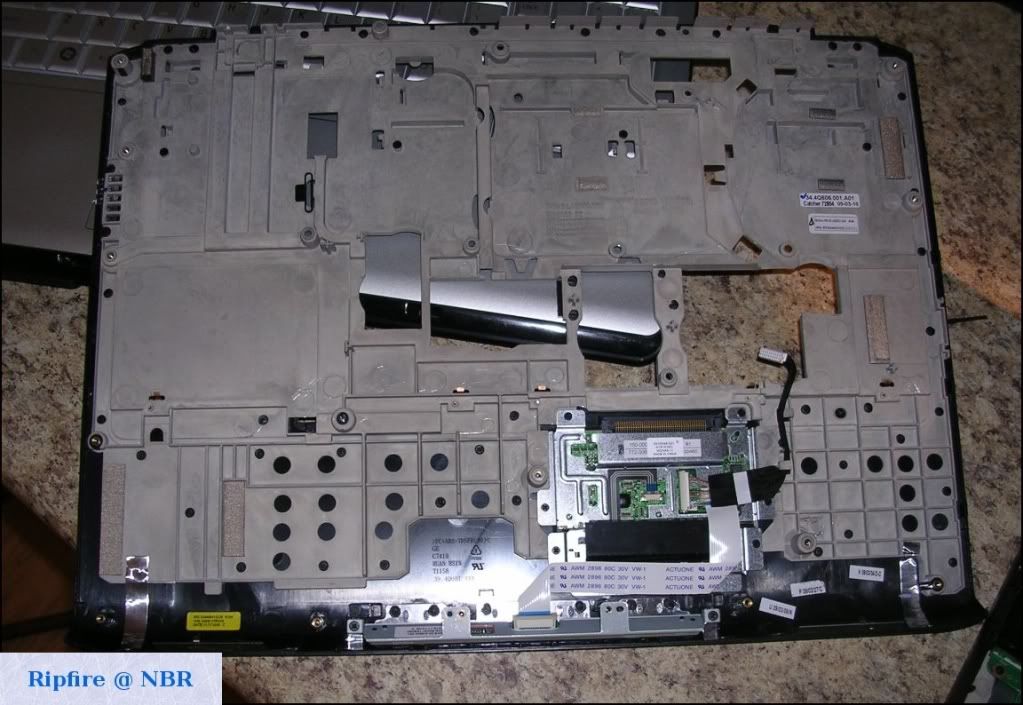
Step 8:
Flip the notebook back over, disconnect the touchpad cable and gently remove the cover. It should come up without too much force, be careful of the plastic tabs, don't break them.
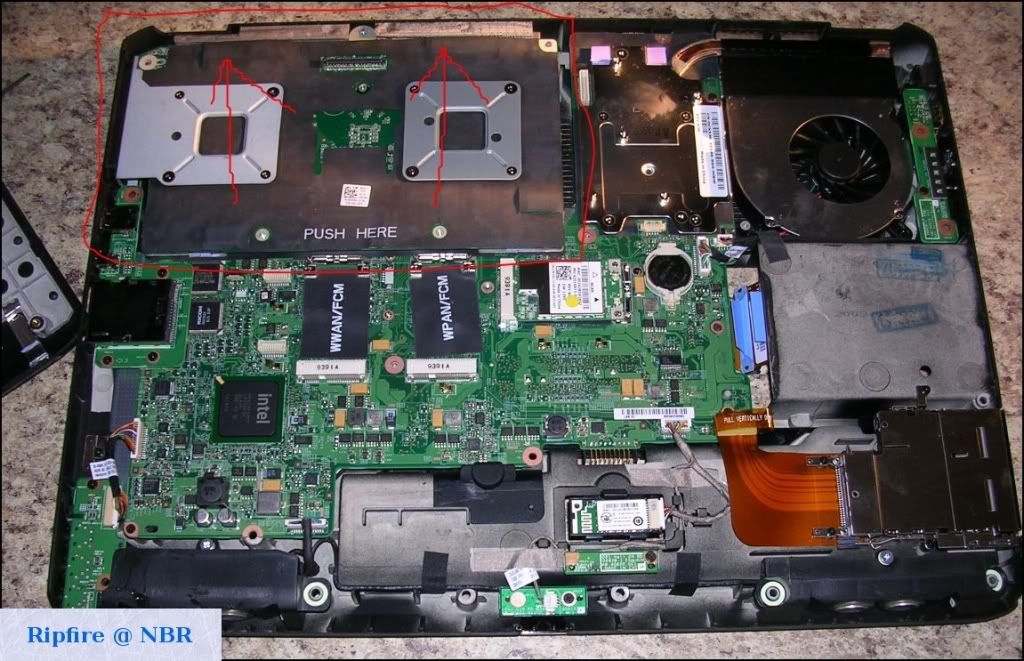
Step 9:
Ok, now that the top is off, start by removing the GPU in the top left corner. Pull up where it says “Push Here”, should come up easily. Sit it to the side for now.
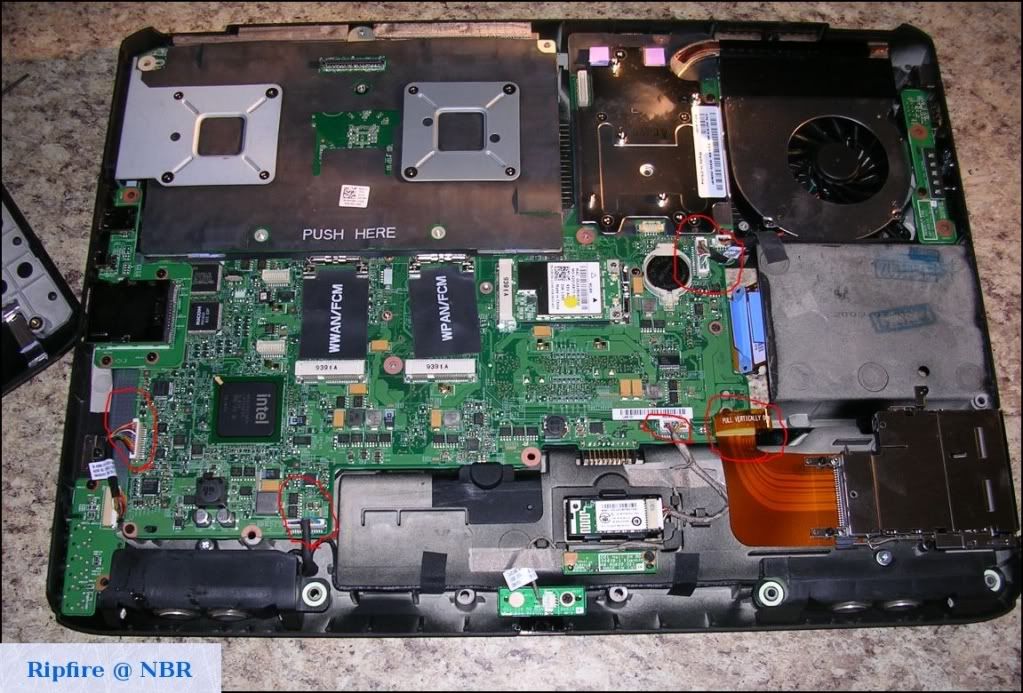
Step 10:
Remove the 5 cables/ribbons marked.
Step 11:
Remove the 6 screws holding the motherboard down, 2 are underneath the GPU, it should be removed already, but wasn't in this picture.

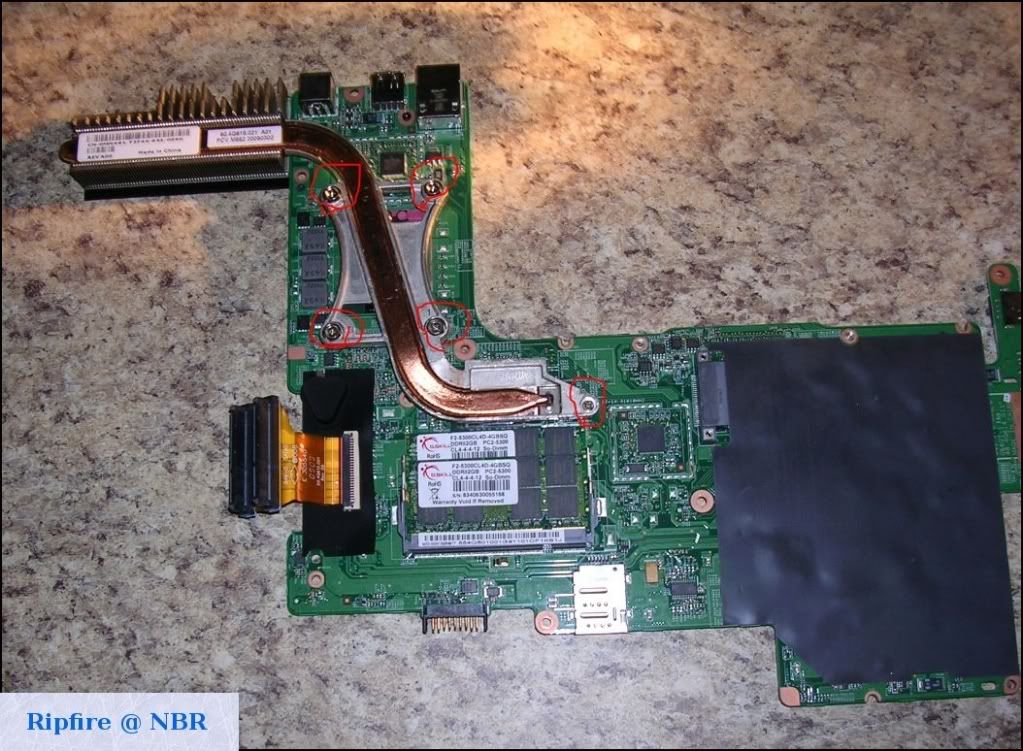
Step 12:
Remove the motherboard, and flip it over, now you should see the cpu, remove the 5 screws and remove the heatsink.
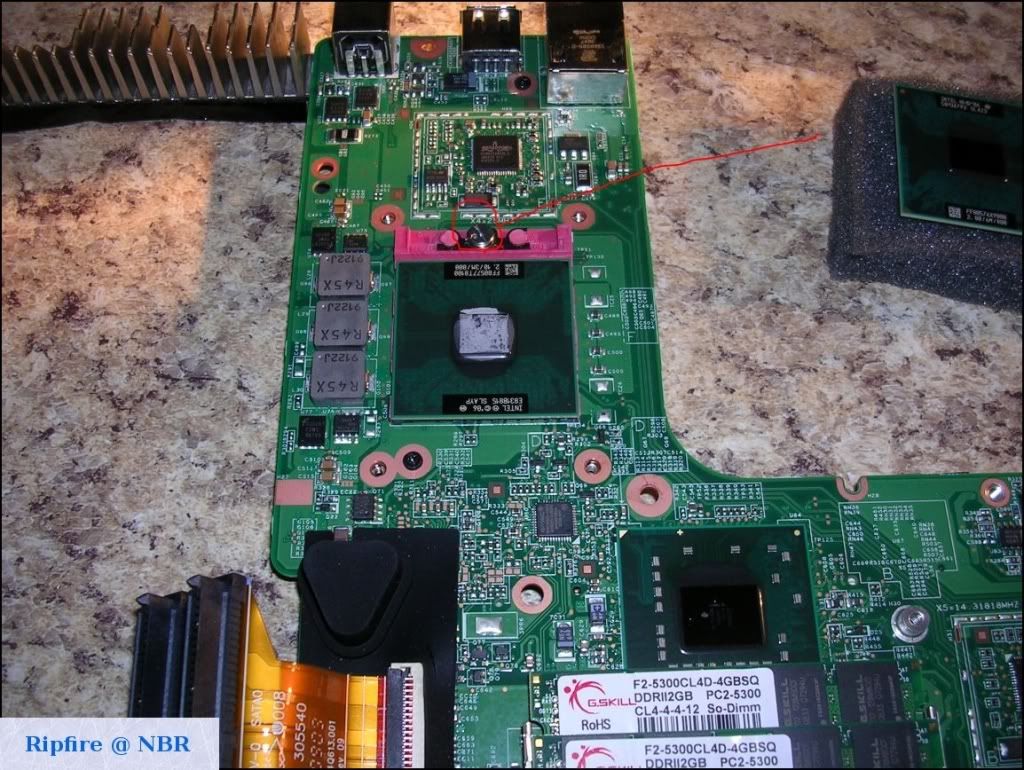
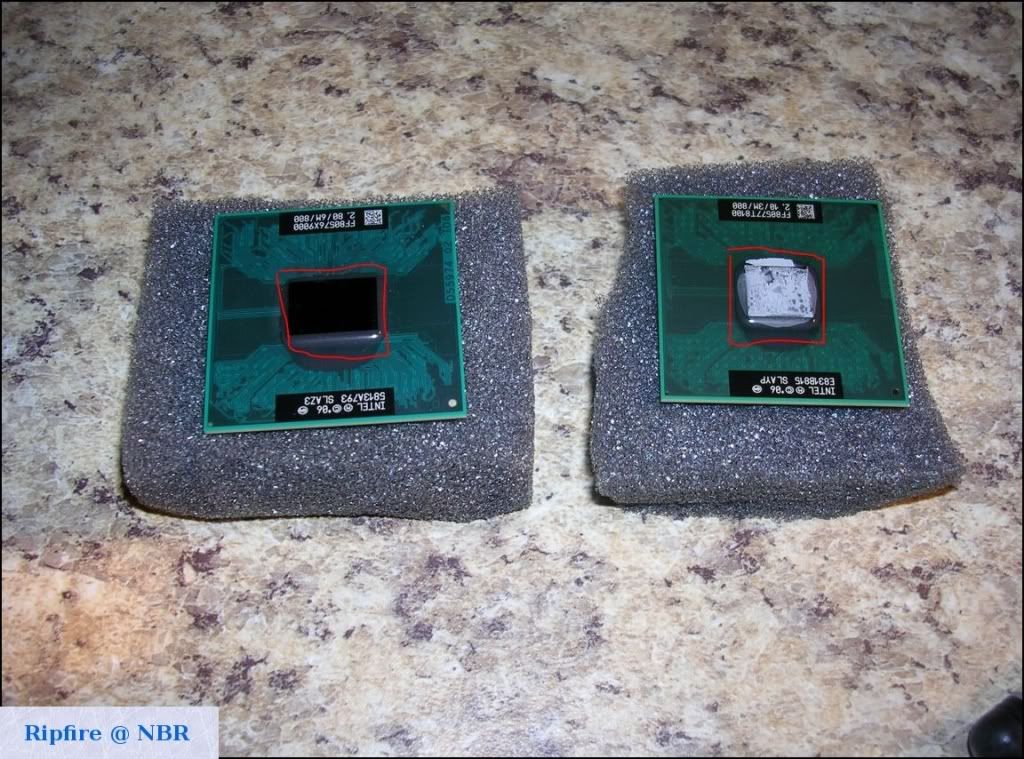
Step 13:
Now you can change the cpu, turn the screw to unlock the cpu, make sure to lock it back when the new one is in place. Don't forget thermal paste, I recommend ArcticSilver5. You want an even paper thin layer on the die of the cpu, less is more. Use Google or http://www.arcticsilver.com/ for detailed instructions.
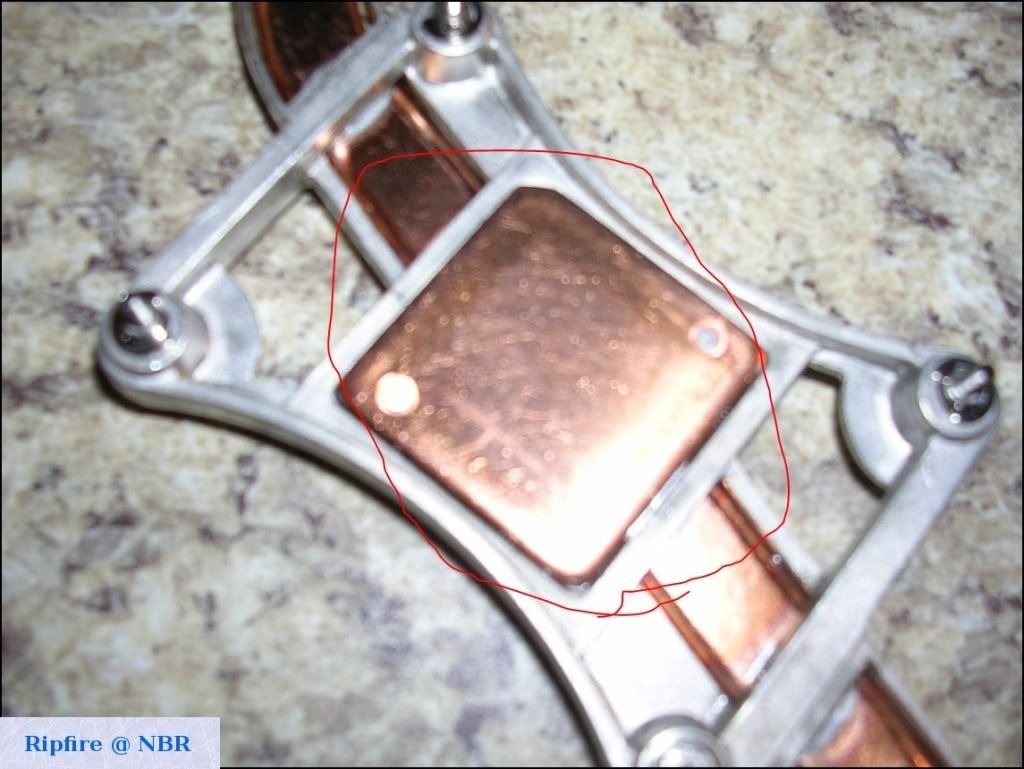
Step 14:
Clean up the heatsink, get all the old thermal paste off.
Before
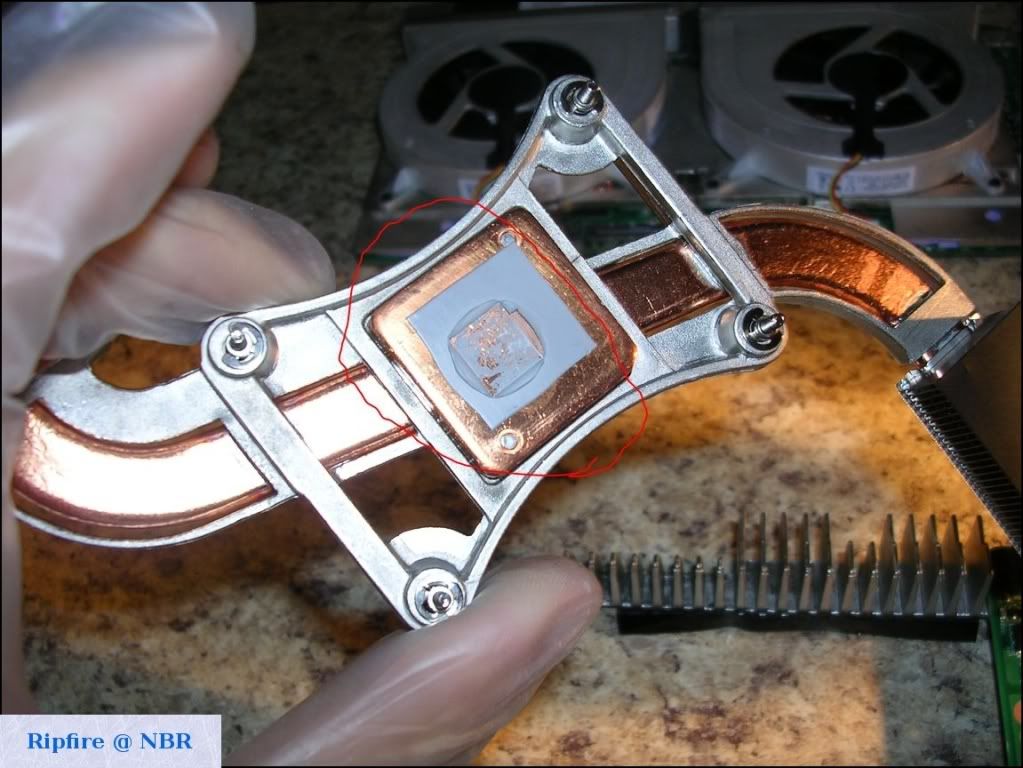
After
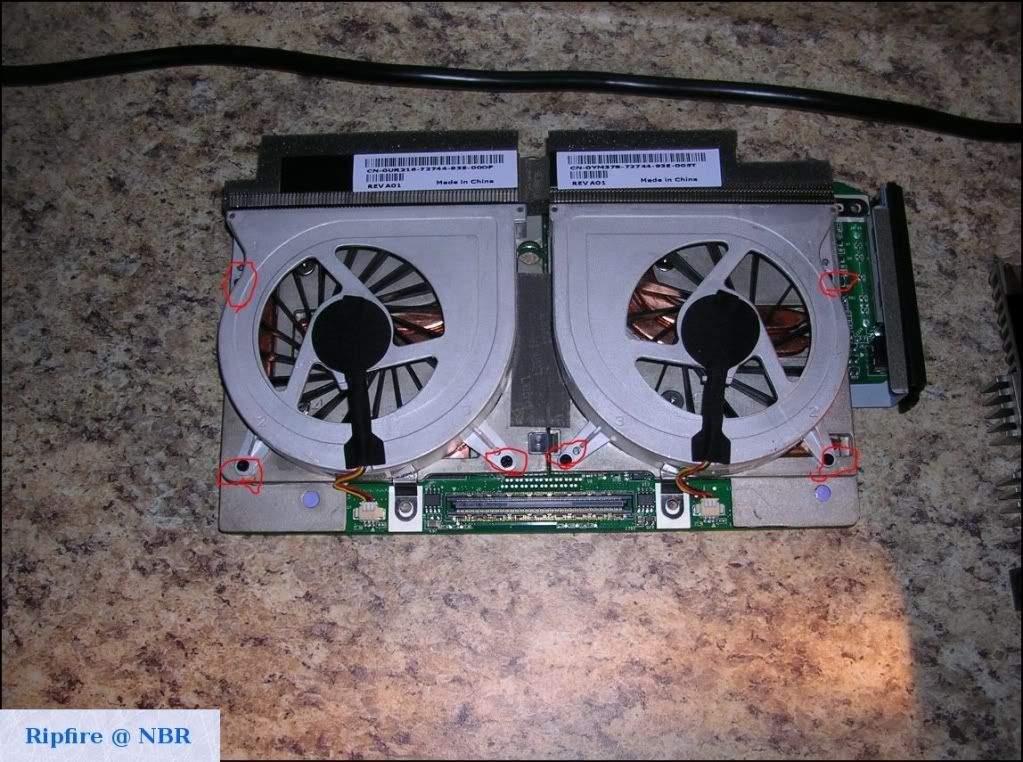
Step 15:
Back to the GPU, start by removing the 6 screws holding the fans on. Then flip them over, leave the cables on until you get the heatsink off, much easier to disconnect then.
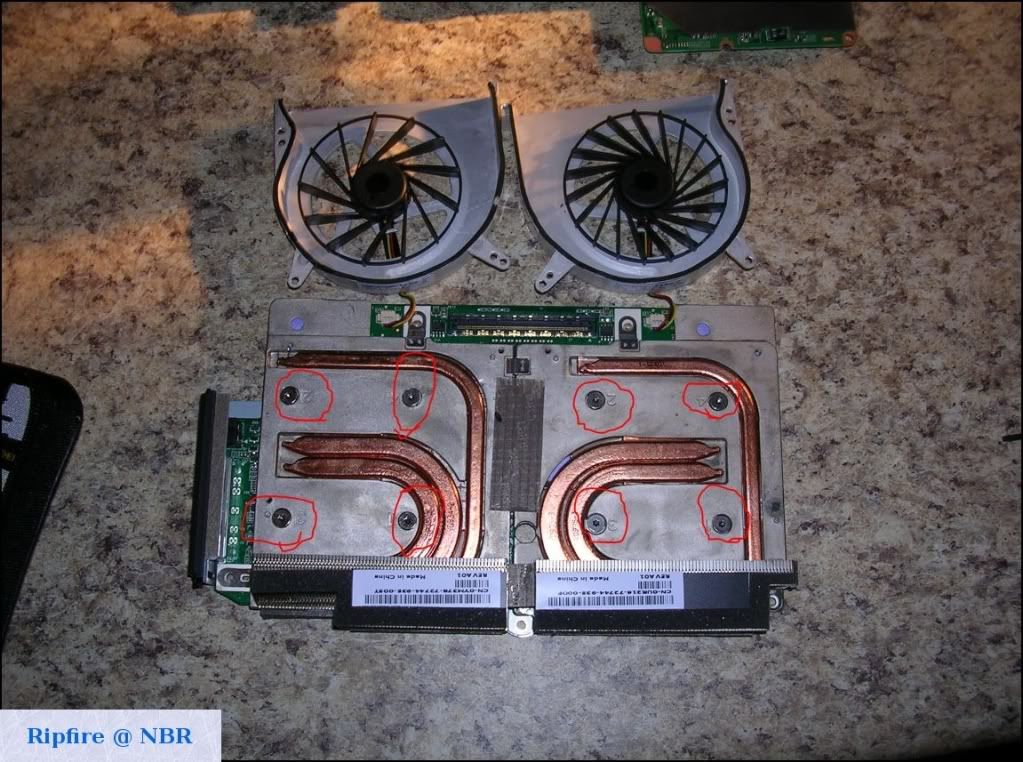
Step 16:
Remove the 8 screws holding the heatsink down and remove it.
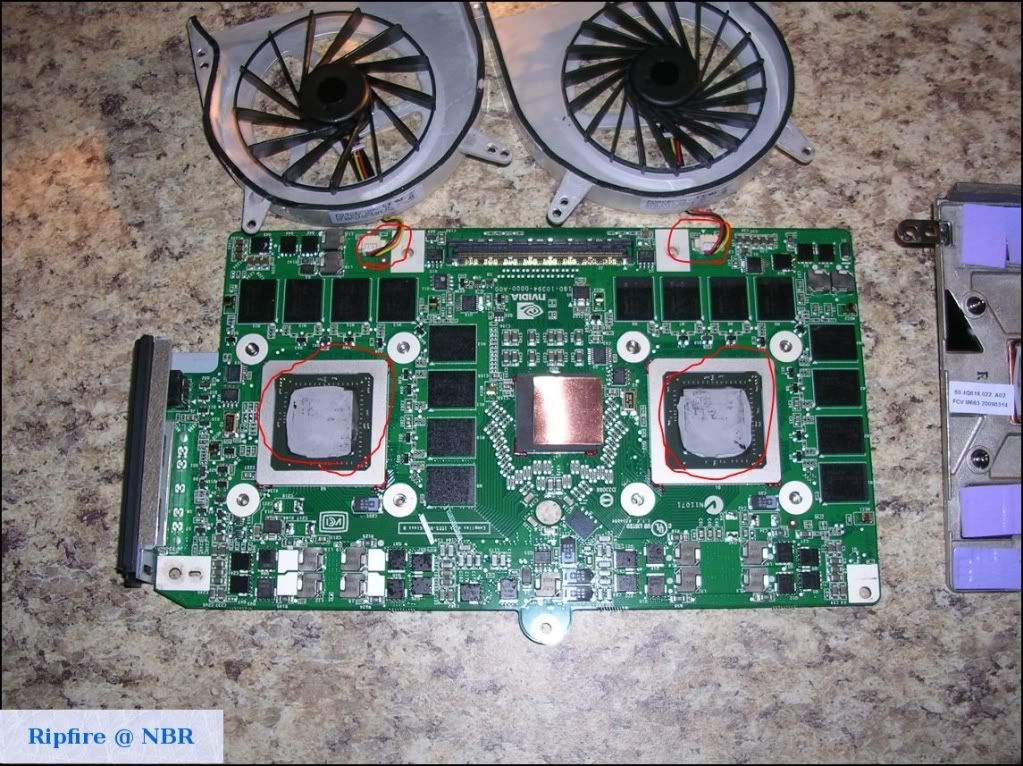
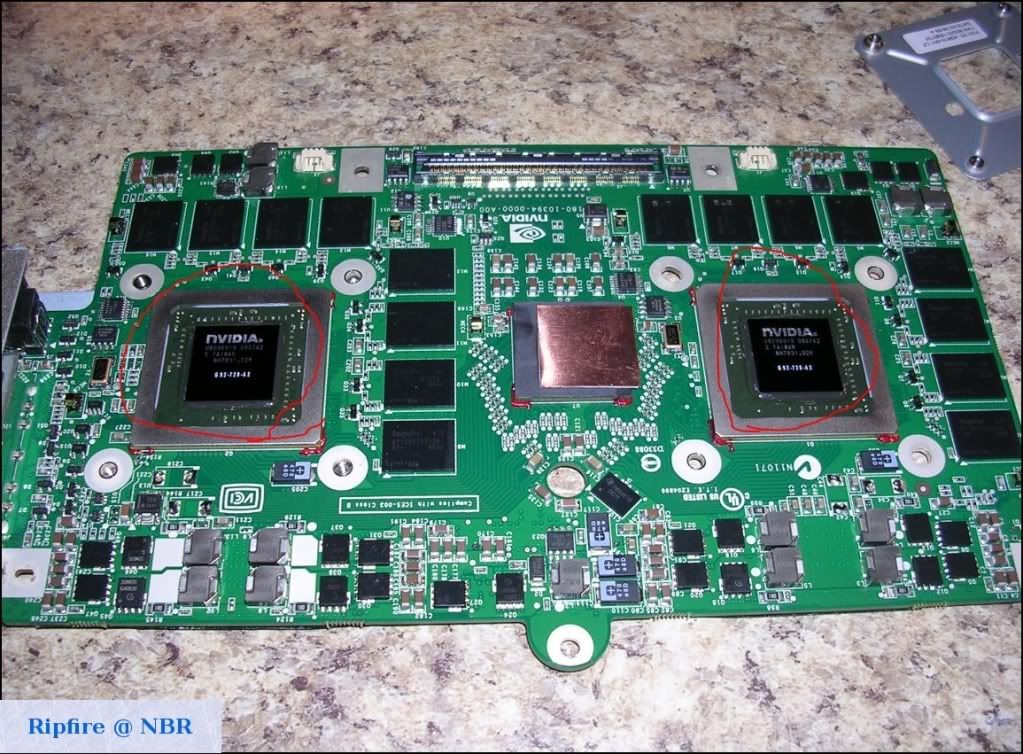
Step 17:
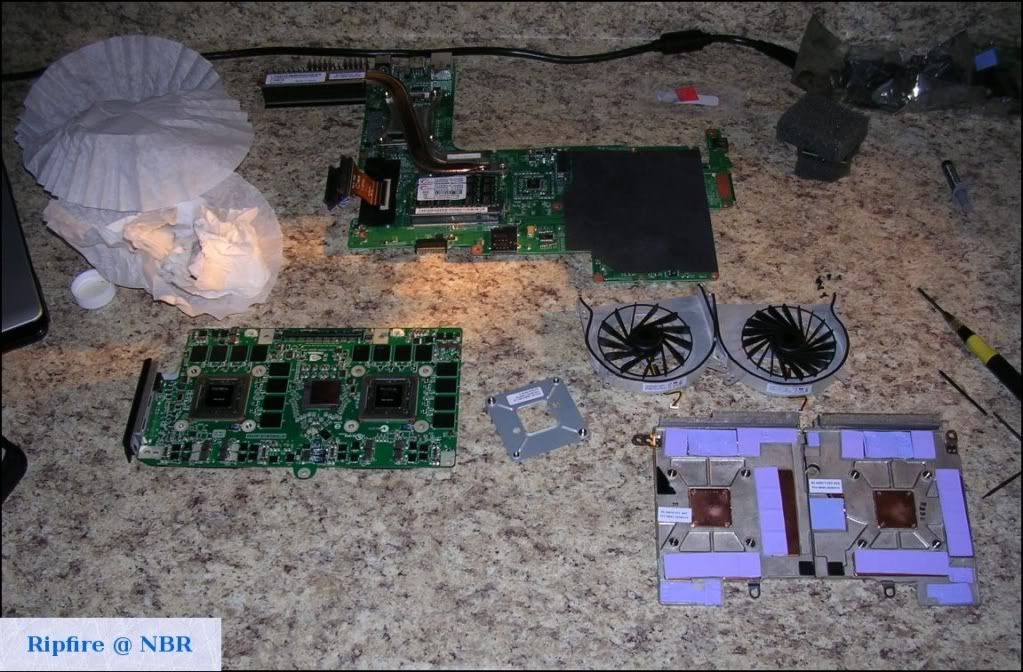
Now disconnect the fan cables, and clean up the GPU dies.
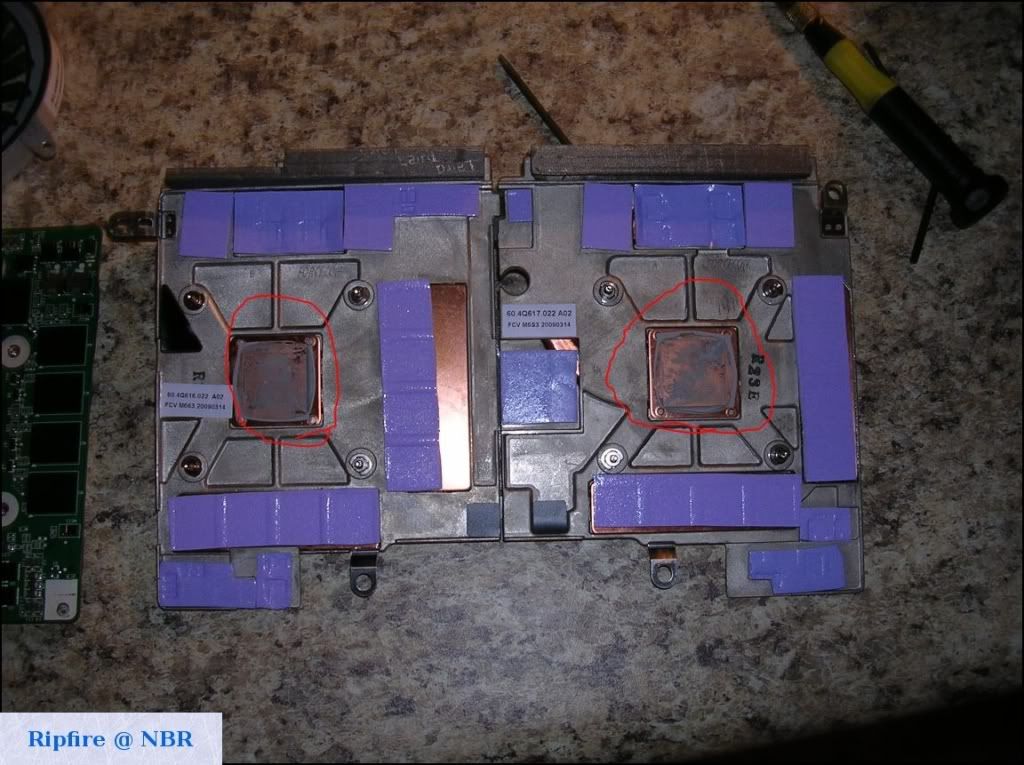
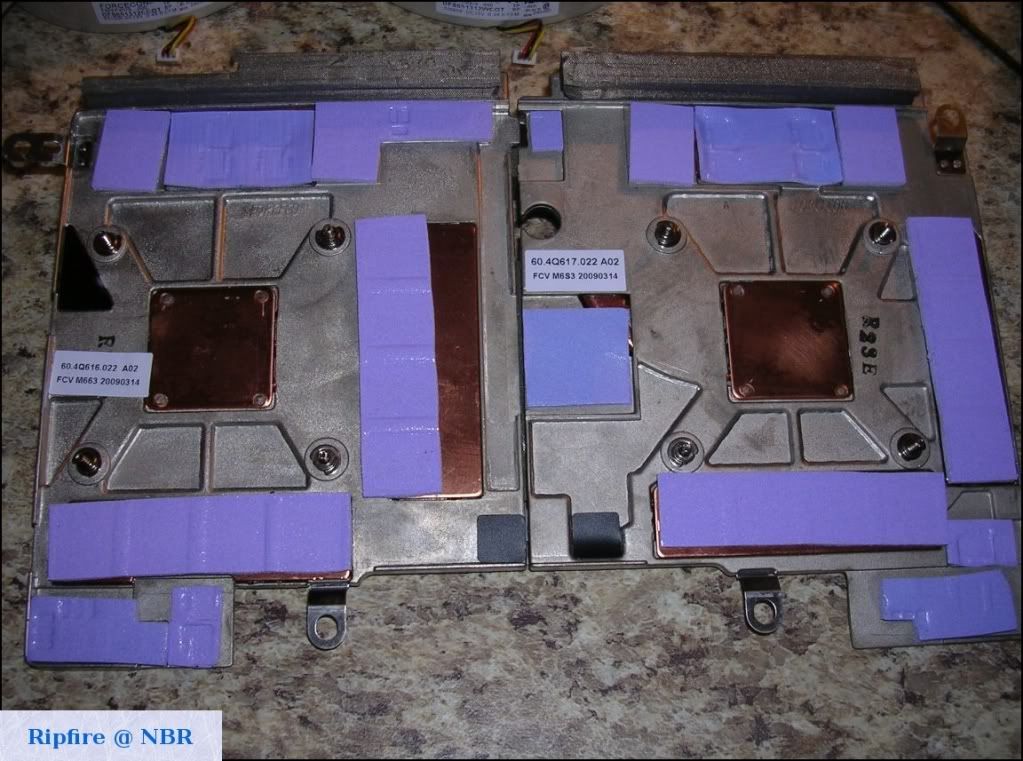
Step 18:
Clean up the GPU heatsink.
GPU with AS5:
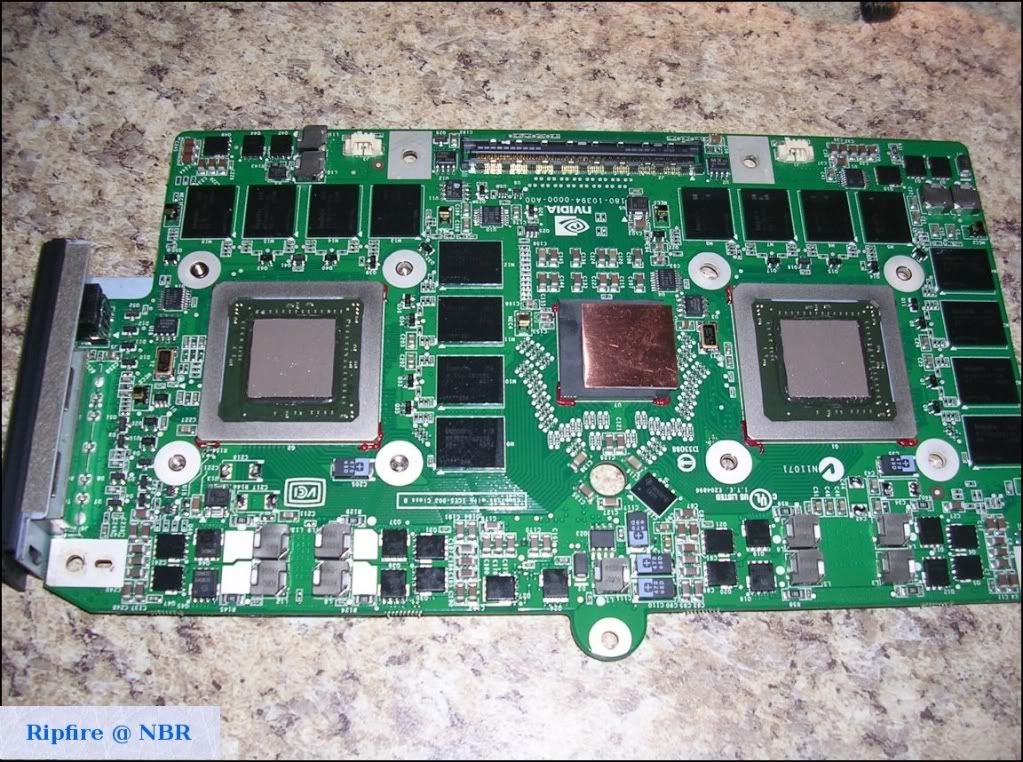
If you made it this far, you did it! Now reverse the steps to put your rig back together, cheers!

Reply 1 : **XPS M1730 Disassembly Guide**
+1! Excellent job with description and pics! Rip, can you edit the post and add the Torx size? Some don't have a full Torx set and it might be helpful if they need to pick up the single.
Reply 2 : **XPS M1730 Disassembly Guide**
+1 Great work! Very handy reference, wouldve been very useful when i changed my CPU. I might AS5 my GPU's now.
Reply 3 : **XPS M1730 Disassembly Guide**
Quote:
Originally Posted by BatBoy

+1! Excellent job with description and pics! Rip, can you edit the post and add the Torx size? Some don't have a full Torx set and it might be helpful if they need to pick up the single.
|
Done, thx for rep guys
Reply 4 : **XPS M1730 Disassembly Guide**
Excellent!!!!!!! Top of the line guide.
Reply 5 : **XPS M1730 Disassembly Guide**
Great guide, this will make upgrading easy for people. I will probably do one for the M6400 within the next week or 2.
Reply 6 : **XPS M1730 Disassembly Guide**
Big thanks! +1 if not +2!
Reply 7 : **XPS M1730 Disassembly Guide**
Big +1! If I ever get brave enough to change something other than my memory, this will be my first stop.
Reply 8 : **XPS M1730 Disassembly Guide**
Bump for all to see. Or at least all that care.
Reply 9 : **XPS M1730 Disassembly Guide**
Excellent post! I can see that you have a Toshiba notebook also.


 I guess laptop manufacturers come from an alien planet
